
In recent years, bee populations have been decreasing at an alarming rate. Factors such as the epidemic of colony collapse disorder, drastic climatic changes and mite infestations have all contributed to their dwindling numbers.
So what can you do to ensure that these industrious beings don’t become extinct? Well, one thing you can do is practice beekeeping.
It’s not as sophisticated as most people assume it to be. All you need to do is invest in the right equipment, look for space and exercise patience. Speaking of equipment, an important piece of that you need is a bee hive kit. In our article, we’ll look at the top-rated beehive kits and explain how you can put these units together.
How to Assemble a Beehive Kit
- Start by gathering all the tools you’ll need for this task. These include a carpenter’s hammer, clamps, nails, pneumatic nail gun, carpenter’s square and power drill.
- Place the four main pieces of your hive box on the ground. Also look for 7D nails that you can use for the assembly.
- Check these pieces keenly to ensure that there aren’t any sharp corners or additional wood that is hanging off. If there are hanging pieces, trim them to create a smooth edge.
- Also check whether the hive box came with predrilled holes. If it doesn’t, this is a good time to drill them. Although it’s not mandatory, doing so will ensure that all the nails are well aligned when the hive box is fully assembled.
- Roughly assemble all the pieces to form a box. Check whether they fit snugly in all the slotted points. The handles should be on the exterior part of the box.
- Place a clamp on every side of the hive box so as to hold the sketchy unit in place as you do some nailing. While it’s possible to nail the pieces without using clamps, they make the process so much easier and convenient. If you don’t use clamps, the amount of energy you put into nailing one section can cause the rest of the pieces to come apart.
- As you secure the box using the clamps, confirm if the dimensions are correct using the carpenter’s square. If they aren’t, make adjustments as needed.
- With the box nicely aligned, start nailing the pieces together. Hammer a nail on one of the top corners. Secure it further by hammering a second nail.
- As you continue nailing, double-check to see if the box is properly aligned. It’s more convenient to make adjustments as you go along rather than end up with an uneven box and have to start from scratch.
- Proceed to another corner and start nailing in the same way you did with the first. Check if the box is uniformly positioned before moving to the other two corners. When you finish nailing, you can then remove the clamps.
- Next, turn the box upside down and put the clamps toward the top so as to secure it. Check whether the corners have formed perfect squares, and adjust where needed.
- Move to one corner and drive in one nail and the adjoining cross nail. Repeat this process until all four corners are securely in place.
- Again, confirm if the box is well aligned. If it is, you can hammer the remaining nails. Start by hammering on one side and then work your way all-around.
Top Beehive Kits
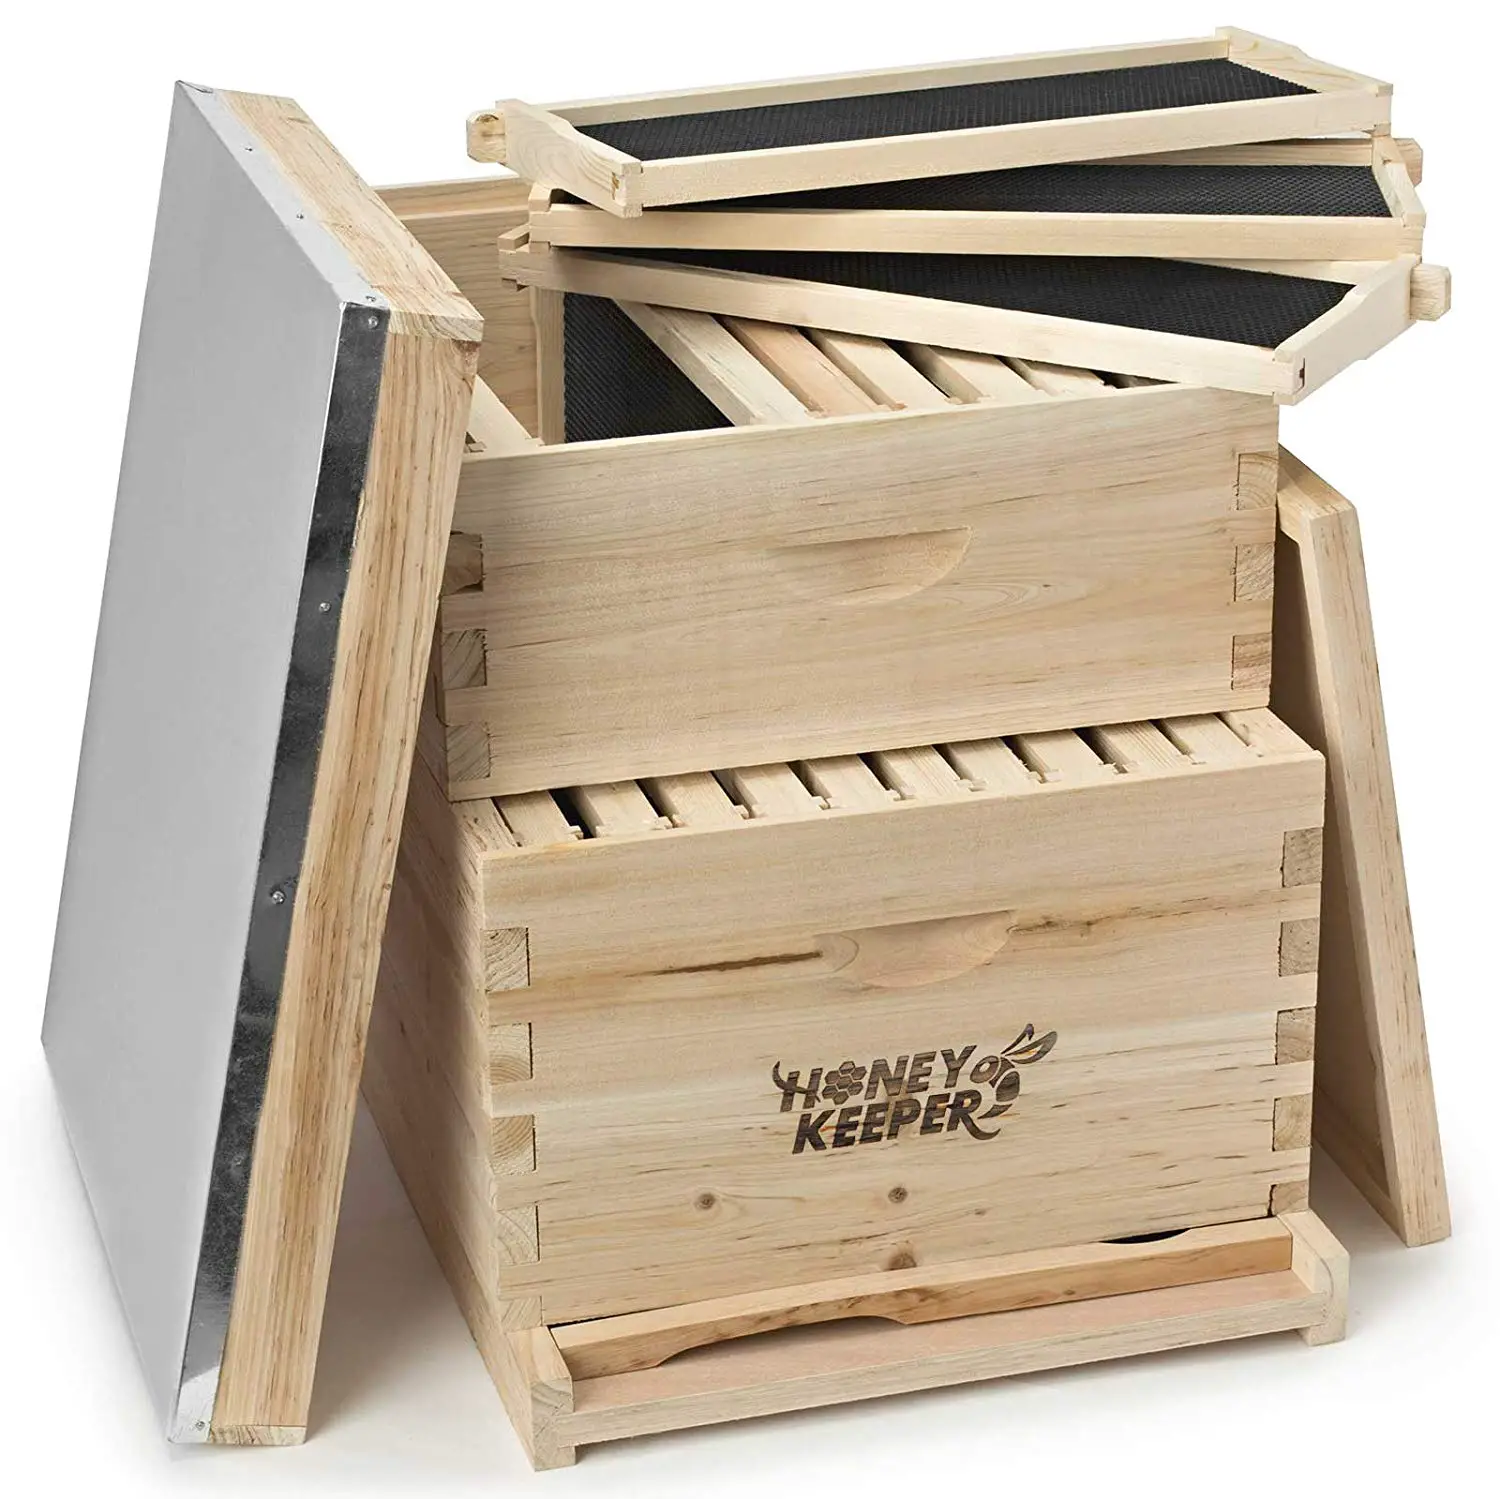
Honey Keeper Beehive Complete Box Kit
The Honey Keeper Beehive Kit, with its 20 frames, is perfect for those who have large colonies. Unlike a 10-frame kit, you won’t have to worry about your colony outgrowing its habitat.
The hive’s foundation is constructed using premium fir wood for ample stability. The frames, on the other hand, are made using white pine wood. Also incorporated in this unit is a telescopic roof that channels rainwater away from the hive.
User tips for this set:
- While the frames are joined using dovetail joints, many users said that they required nails or used glue or wood putty to secure some joints that were a touch loose.
- Many users suggest painting the outside of the hive to increase the woods durability.
- Some users have noted that their bees keep making burr comb across the frames because of the slippery nature of the plastic frames the set comes with, but note that this can be easily solved by simply waxing the frame.
Pros:
- Very good value for money.
- Light wood makes construction easy.
- Can be built in only a few hours.
- Easy to follow instructions.
- A large hive perfect for new swarms.
Cons:
- Some joints may need to be strengthened.
- Unwaxed frames may cause burr comb.
- May have gaps that will need to be filled.
CO-Z Bee Hive
With the CO-Z Bee Hive, the exterior frames are made of cedar wood while the foundation frames are fabricated from pinewood. Thanks to this combination, the hive boasts resistance to wear and tear, decay and rotting.
Like the Honey Keeper unit, this one also has a metallic roof which keeps out the elements. We also like that most of the sections are pre-assembled. According to the manufacturer, it takes only 10 minutes to assemble the rest of it.
Langstroth Wax Coated Bee Hive
This beehive kit by Hoover Hives is more suited for beginner beekeepers or those looking to grow a new colony. With only eight frames, the kit is enough to build a small-sized hive.
On the plus side, the manufacturer provides everything you need for the setup. These include wax-coated foundation frames, foundation surfaces, pre-cut frames, an inner cover and even a bottom board.
Summary
Choosing a beehive kit is one of the most vital decisions you’ll make in your beekeeping journey. Not only will this determine the type of habitation your bees will have but it will also affect how they produce honey.
While there are many beehive kits on the market, one of the most reliable units is the Honey Keeper 20-frame Beehive. It requires minimal assembly and is equipped with a telescoping roof to keep harsh elements out.
![3 Big Mistakes Beginner Beekeepers Make [And How To Avoid Them!]](https://beekeepingabc.com/wp-content/uploads/2020/11/3-mistakes-beginner-beekeepers-make-90x75.jpg)

![Move over ducks, Queen Bees quack too! [Here’s Why]](https://beekeepingabc.com/wp-content/uploads/2020/06/queen-bee-90x75.png)
![The Flow Hive 2 Review [ Vs. The Classic Flow Hive]](https://beekeepingabc.com/wp-content/uploads/2020/02/Flow-Hive-2-90x75.jpg)
![How Bees Fly [10 Facts About How, When, and Why]](https://beekeepingabc.com/wp-content/uploads/2019/12/A-Bee-Flying-90x75.jpg)